EN
EN
 PL
PL
Creating scheduled tasks
The MSPControl-based hosting environment lets users run a number of tasks—depending on the hosting plan—for maintenance and environment management. The following tasks are currently available (they can be started at defined intervals, by default no more often than every 5 minutes):
- Backup Database (both MySQL and MS SQL Server)
- Check Web Site Availability
- Send Files via FTP
- Send E-mail Notification
- Zip Space Files (archive space contents into a file)
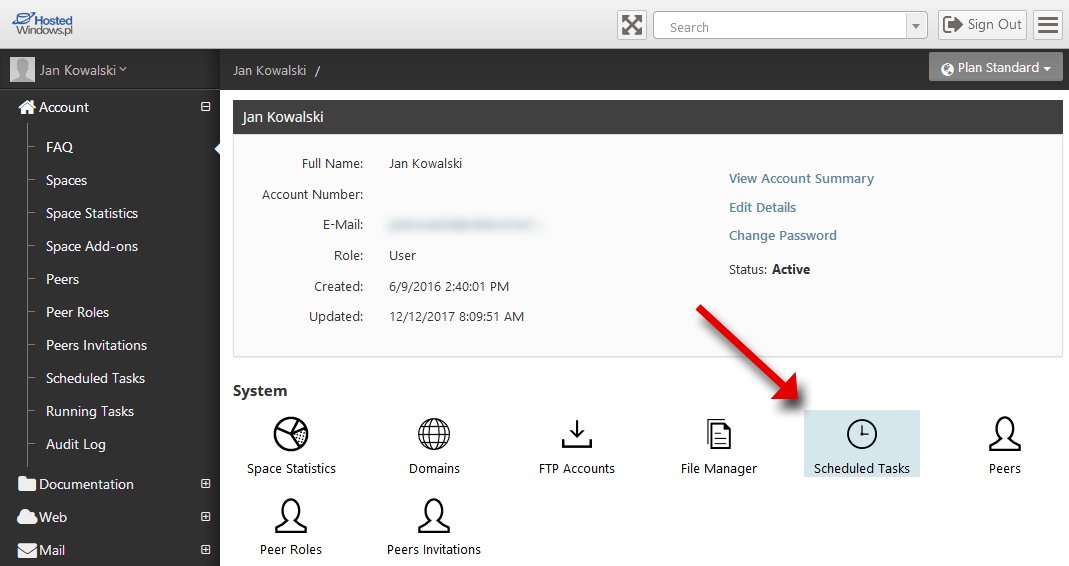
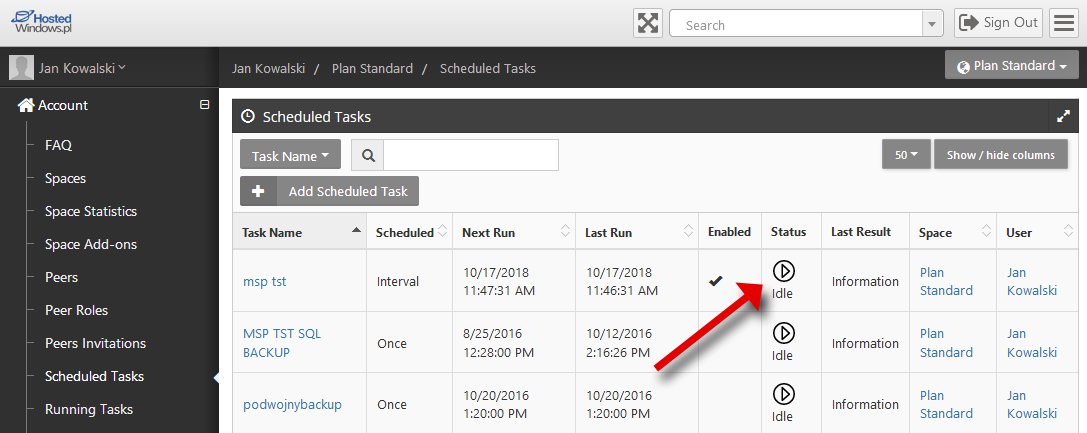
To manage tasks, on the account home page select the Scheduled Tasks (Scheduled tasks) link:
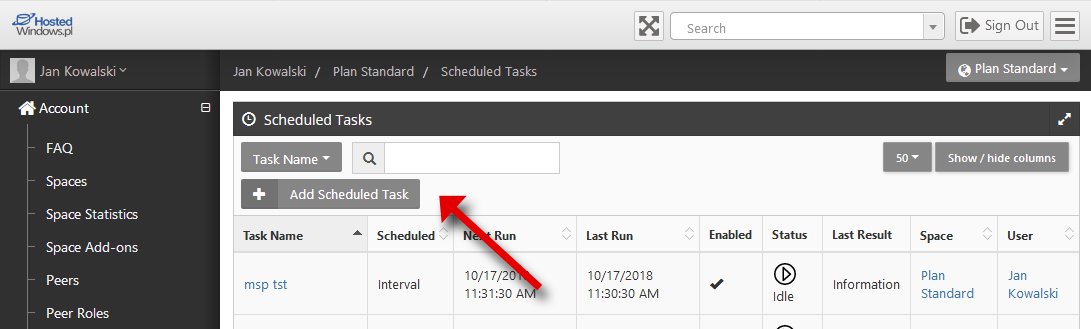
To create a new task, click the Add Scheduled Task (Add scheduled task) button:
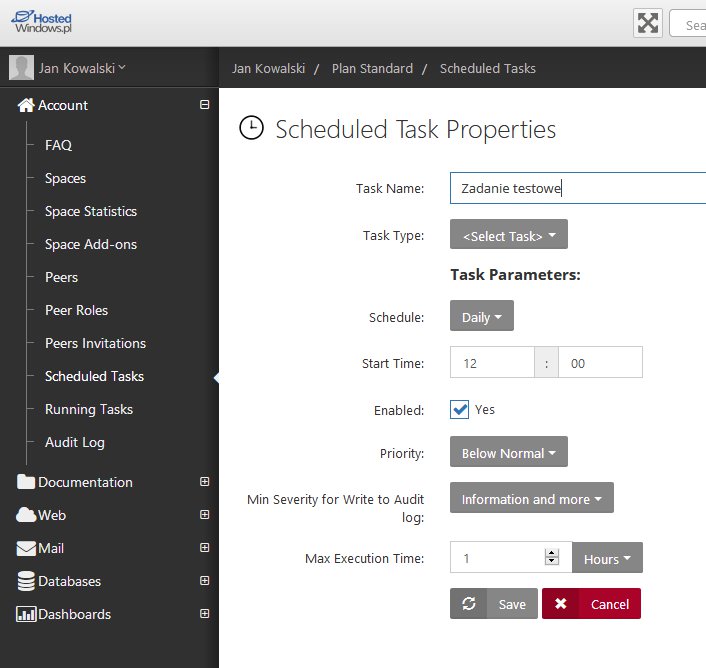
Select a task name and its type from the drop-down list. The remaining parameters depend on the selected task type. After choosing the task parameters, select the start time and the priority at which it will run, and then save by clicking Save (Save)
To run the created task immediately (e.g., to test it), click the Start![]() icon in the task list. For each task you can view the execution report and the execution entry in the audit logs.
icon in the task list. For each task you can view the execution report and the execution entry in the audit logs.
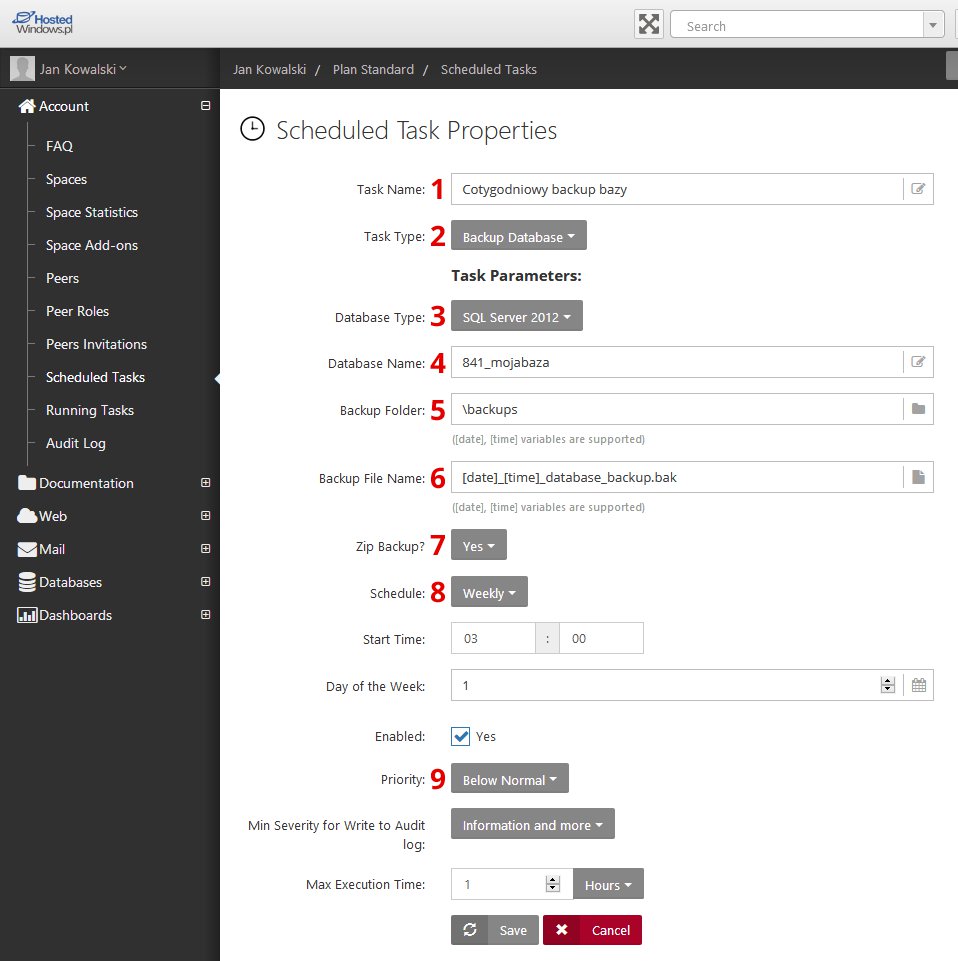
Example task configuration for the scenario:
“Database backup on a weekly cycle with a date/time variable appended to the file name”
1. Enter a name for the new task.
2. Select Backup Database (Database backup).
3. For database type choose SQL Server 2019.
4. Enter the full name of your database to be backed up.
5. Provide the directory where the database backup file will be saved (by default the \backups folder is created).
6. Enter the backup file name (using the [date] [time] variable adds the backup’s date and time to the file name).
7. From the drop-down list choose whether the backup should be compressed into a ZIP file.
8. From the schedule select Weekly and define the start time and day of the week.
9. Select the priority at which the task should run and the maximum execution time.
10. Finally click Save.