 EN
EN
 PL
PL
Publishing an application with Visual Studio
To publish an application using Visual Studio, open your site’s properties and select Web Publishing.
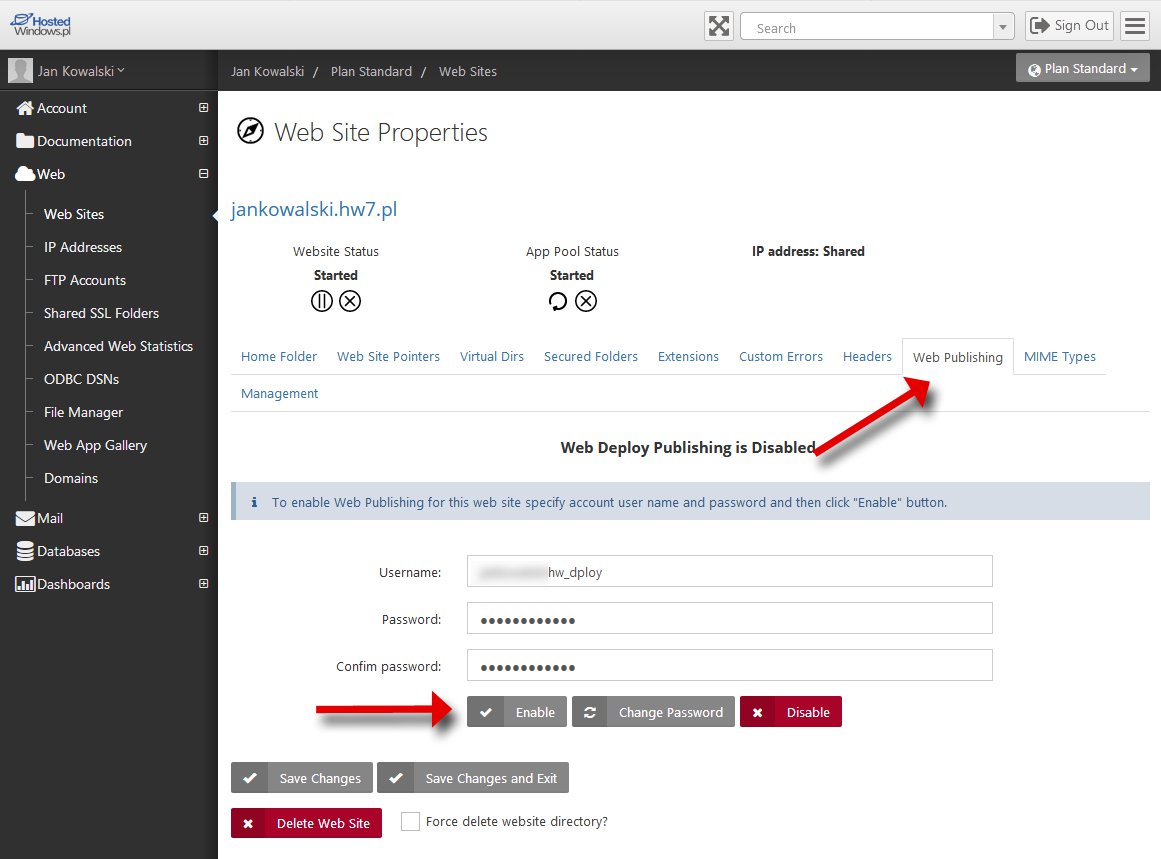
The user name (Username) is generated automatically from your application name.
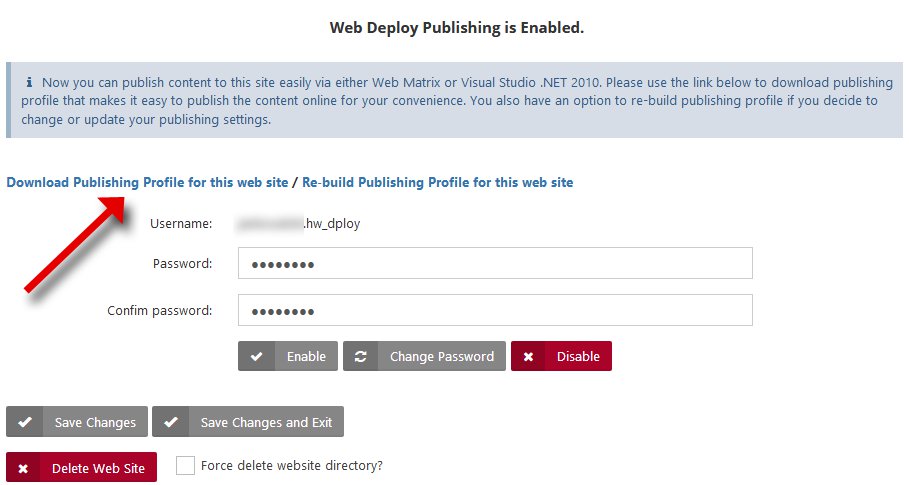
Enter the password and choose Enable; after publication is enabled successfully, the message below should appear.

Next, download the publishing profile (Download Publishing Profile for this web site), which you can import in Visual Studio to publish the application.
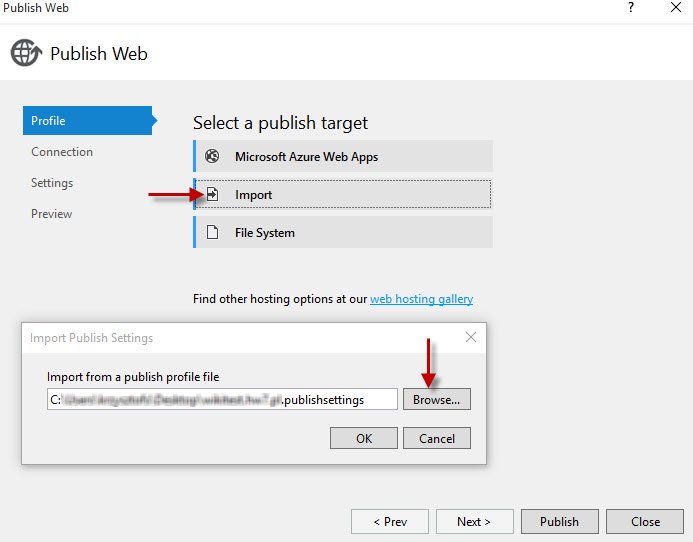
In Visual Studio select your project, right-click the project name and choose Publish…

In the Select a publish target section choose Import and browse to the previously downloaded *.publishsettings file.
In the Connection section, the following fields are filled in automatically from the *.publishsettings file.
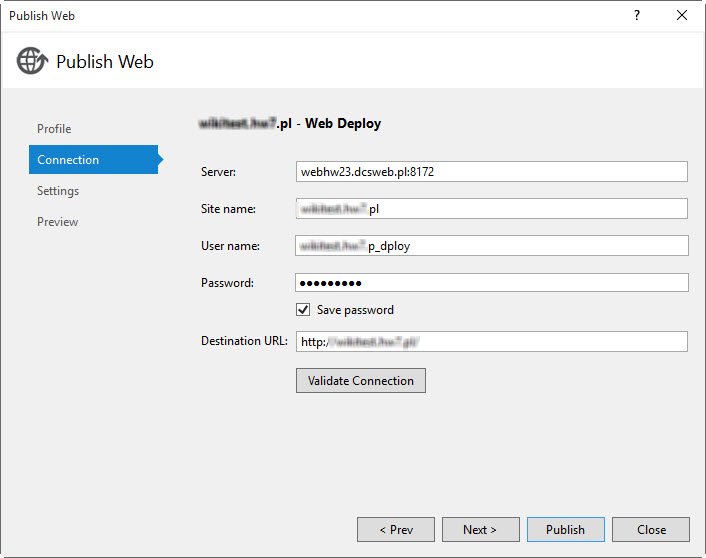
NOTE! The server address may differ depending on your hosting plan.
In the Settings section configure the parameters as required.
Finally click Publish.
Note: If you encounter problems publishing directly to our server, verify the permission settings for the user in Visual Studio. A description of the issue and the correct configuration can be found, for example, in the article at this link.